Savory Ham Scones with Cheddar and Sage
October 28, 2014 § 5 Comments
It started last evening, a nice warm autumn drizzle which then turned into a whole day of downpours. What I would call a soup day, and I had everything I needed to make my Cabbage, Ham and Potato Soup. So that’s what I did, and as the soup simmered away, I pondered what to do with a little bit of extra ham I had leftover. So since I always have some good Vermont cheddar in the fridge, I came up with this: a savory scone, to slather with butter, to have for breakfast or with breakfast, to grab as a quick snack or just have with that bowl of soup.
It’s a basic recipe and you can easily change the ingredients depending on your mood or what you have in your kitchen. Here’s a few ideas:
Bacon and Onion: cook enough chopped bacon to measure about 3/4 cup, sauté 1/2 minced onion until soft
Apple and Cheddar: a classic, use 1 cup peeled, chopped apple and 1 cup grated cheddar
Sun dried Tomato and Goat Cheese: chop 1 cup drained sun dried tomato and add with about 1 cup crumbled goat cheese
Olive and Pine Nut: chop about 1 cup olives finely, then add 1/2 cup pine nuts at the end
You can change the herbs, try thyme, oregano or lavender, add some sautéed mushrooms, substitute different cheeses (crumbled bleu would be delicious) the list is pretty endless.
Basic Recipe:
2 cups flour, I use organic white spelt
1 TBL baking powder
1/4 tsp salt
1/4 tsp pepper
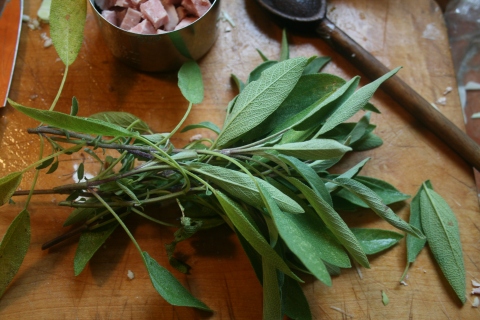
1 – 2 TBL fresh chopped sage or 3/4 tsp crumbled dried
1 tsp sugar
6 TBL cold unsalted butter, cut into cubes
1 cup coarsely grated cheddar cheese
1 cup chopped ham
1 egg, beaten
about 1/4 cup heavy cream
Preheat oven to 425 degrees. Grease a cookie sheet or line with parchment.
Combine the dry ingredients, including the sage.
Cut in the butter until it resembles small peas, with either your fingers or a pastry cutter.
Add the ham and cheese and stir.
Beat the egg and cream together and add to dry ingredients. Mix well with a fork.
Knead it all together right in the bowl, if it seems a bit dry add a little more cream until it holds together. You don’t want to overwork it, just a few kneads will do.
Pat out on a floured surface and shape into a 7″ disk, about 3/4″ thick.
Transfer to your baking sheet, then using a knife, cut it into 8 wedges, like a pie.
Separate the wedges a bit, then brush with a bit of cream to give it a nice golden crust.
Bake about 18 to 22 minutes until golden brown.
Let cool right on the cookie sheet.
These are best served warm, and if by some miracle you have any left over the next day, wrap in foil and heat in a 300 degree oven about 15 minutes.
Makes 8 scones.
Cheesy Tomato Pie
August 12, 2014 § 1 Comment
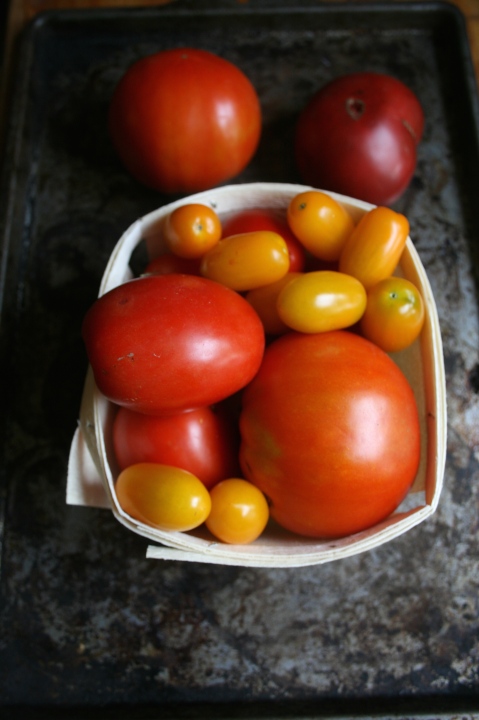
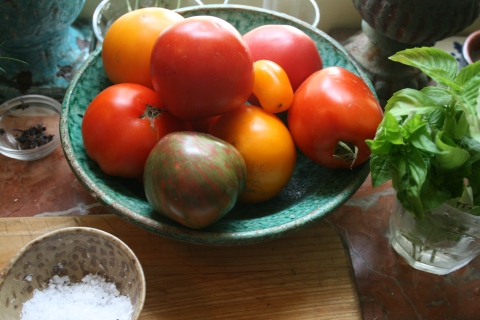
The time we have all been waiting for has come. Summer tomatoes are here! My favorite way to eat them is the famous tomato sandwich- sliced thickly, sprinkled with a good flaky sea salt, homemade mayo on sourdough bread.
But one can only eat so many tomato sandwiches.
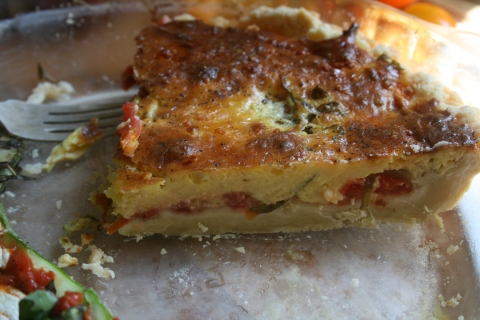
So besides making quarts of sauce and salsa and watching them sit on my counter I thought I’d put them into a pie, a savory, cheesy, quiche-like pie. Now you could easily buy a ready made pie crust and just put the ingredients in, but if you know me, I can’t do that. It just doesn’t taste the same. But that’s just me. Don’t let that stop you from making this, it’s easy and delicious and even better the next day.
You probably have all the ingredients in your kitchen: flour, butter, cheddar, eggs, mayonnaise and those tomatoes. You can stick with this simple recipe or doctor it up a bit, adding some bacon or ham, chunks of sausage, or even change the cheese. Try goat or feta as long as you keep the basic tomato thing going.
It’s great for lunch, brunch or even a light dinner with a salad and some sautéed zucchini, another one of those vegetables you can’t eat fast enough.
Ingredients for Crust:
2 cups flour, I use white spelt
1 3/4 sticks unsalted butter, cut into chunks
1/2 tsp salt
1/4 cup ice water
Ingredients for filling:
4 large tomatoes
2 cups grated cheddar
1/2 cup mayonnaise
1/2 tsp Dijon mustard
2 eggs, beaten
fresh basil leaves, about 1/2 cup, julienned
a little salt and pepper to taste
Mix flour and salt together, then add the butter and cut in with your fingers, or put in food processor and pulse a few times until the butter is the size of peas. Add the ice water until the dough just holds together, press into a ball, flatten and refrigerate at least an hour.
Preheat the oven to 400 degrees.
When you’re ready, roll out the dough then press into a 9″ pie dish.
Bake in the preheated oven for 8 minutes while you mix cheese, mayonnaise, mustard, eggs, salt and pepper to taste in a small bowl.
While you’re waiting for the crust in the oven, cut the tomatoes into slices, not too thin, put into a colander, then sprinkle with salt to let the water drain out. About 10 minutes or so will do.
Pat the tomato slices dry, then place on top of pre baked crust.
Top with the basil, then spread the cheese/egg mixture over all.
Bake about 25 minutes until nice and brown.
Try to wait before cutting into this, it’s best served lukewarm.
Scrambled Egg Muffins
July 12, 2014 § Leave a comment
Breakfast can be a challenge for me sometimes. I have a piece of bacon or sausage and some fruit, like melon, or a bowl of strawberries with some fresh cream poured over, and a cup of coffee. In winter it’s usually oatmeal, again with fruit, maple syrup and cream. Of course eggs are in there too, but today I got tired of the over-easy version and got a little creative.
I love a muffin in the morning, but I try to avoid flour if I can. And I’m not a fan of gluten free flours really, I don’t think some of the substitutes are all that healthy…. so this is basically an egg beaten with salt and pepper and poured into a muffin tin. Pretty simple!
I added quite a few things to the “recipe”- whatever I had in the fridge really….leftover broccoli, chopped kale, a few cherry tomatoes and of course cheese. Gotta have cheese – pretty much on everything!
So give these a try, they are great for anytime you want a snack, packed in lunch boxes and for traveling, and of course breakfast, still warm from the oven.
Here’s the “recipe”
12 eggs, one for each muffin cup
salt and pepper
vegetables, either left over of fresh
goat cheese, cheddar, feta, Parmesan-as much or little as you like-I used a heaping TBL on top of each one.
Pine nuts or any type of seed, sesame or pumpkin, etc.
Minced garlic, fresh herbs
Preheat oven to 350 degrees.
Grease a 12 cup muffin tin or line with paper liners.
Beat the eggs. If you’re making different kinds, I suggest separating some of the eggs into different bowls for the different ingredients ( like 2 eggs with kale and cheddar, and 2 eggs with tomatoes, broccoli and goat cheese, etc. I find it easier to pour into the cups this way). Or just beat them all at once, then add the veggies.
Add salt and pepper to taste, remembering if you add cheese it may be salty already.
Add the veggies, then sprinkle on the cheese and seeds, etc.
Pour into muffin tin and bake about 30 minutes until knife inserted comes out clean.
And that’s it. You can get creative here, of course, add some cooked bacon, a little cooked sausage, some sun dried tomatoes, herbs, pretty much anything goes!
Making your own Nut Butters
June 12, 2014 § 2 Comments
It’s pretty much the easiest thing in the world to do. Put nuts in food processor and turn on.
You’ll know exactly what’s in it, and what’s not: bad things like hydrogenated oils, sugar, (do we really need sugar in everything?) and preservatives. And organic nut butters are expensive I’m sure you know!
It would be a good thing if people started making foods like this from scratch. Picking up a jar of peanut butter from the store is easier, sure, but seriously, home cooking is where health starts. Do we really not have that extra 10 minutes? Besides, there is something rewarding about taking a batch of nuts and turning them into smooth and creamy butter. Really, it’s true. Only 3 requirements: a food processor, some nuts and time. Usually about 10 minutes from start to finish, depending on your food processor. You could make this in a Vitamix too, I don’t have one so I’ve never tried it.
And the taste is so fresh, and much “nuttier” is how I would describe it.
Here are a few “recipes” to get you started!
Basic Peanut Butter
Take 3 cups roasted, unsalted organic* peanuts and put in food processor. Use the steel blade.
Start processing. After a minute or so, stop engine and scrape. Resume.
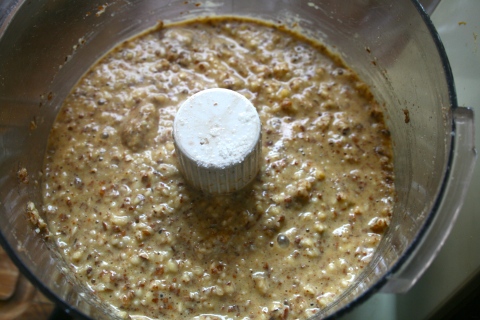
Nuts will go through several stages, from coarsely ground, to finely ground, to clumpy.
You may have to scrape the sides occasionally, then keep going and you’ll see it start to turn creamy.
After about 3 to 4 minutes you’ll have the best, smoothest, nuttiest peanut butter you’ve ever tasted!
If you want it a bit chunkier, add a few peanuts at the end.
Almond Butter
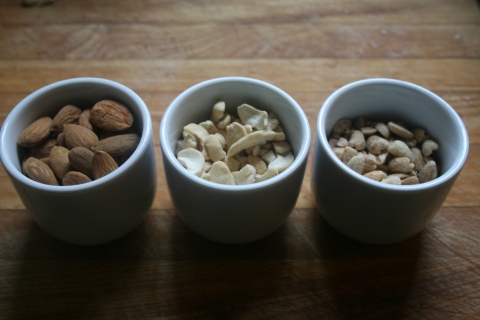
3 cups raw organic almonds
1/2 tsp sea salt
Process as above, adding salt at the end
Coconut Almond Cashew Butter
1 cup almonds
1 cup cashews
1/2 cup walnuts or pecans
1/2 cup unsweetened coconut flakes
1 to 2 TBL melted coconut oil
Add all nuts and coconut flakes to food processor and process until nuts turn creamy, scraping down sides occasionally. Add coconut oil at the end.
Store all in refrigerator when done.
You can roast the nuts in all these butters, to concentrate the nutty flavor. A 300 degree oven for 10 minutes on a cookie sheet. Let cool before processing. Try adding some extras, like chocolate chips, coconut flakes, cinnamon, a little bit of maple syrup or honey, raisins. Add at the end and stir in with a spoon.
And experiment with different nut combinations too. Throw a few peanuts into the almond butter, or pistachios into the peanut butter. Or try sunflower or pumpkin seeds stirred in for an extra flavor and nutritional boost. You really will wonder why you haven’t been doing this all along!
*peanuts are one of the most carcinogenic and pesticide laden things you can eat
Gluten Free Nut Muffins
May 9, 2014 § 1 Comment
Many, many years ago I found a book called “Food and the Gut Reaction” by Elaine Gottschall. I’m sure many of you have heard of this book. It contains diet and nutritional information to help people with serious intestinal issues such as Crohn’s Disease, Ulcerative Colitis and the like. Back then diet was not even considered for these illnesses, and really most allopathic doctors still think that way today.
Although no one in my family had any of these illnesses, the book supplied valuable information and helped me on my quest to understand the body. It also had many healthy recipes, one of them these delicious nut muffins. When I want to avoid gluten for awhile, which I think is a good idea, I make these.
Here’s the basic recipe and some variations. Just put it all in the food processor, no other bowls needed. You can use almost any nut, walnuts, almonds, pecans, or hazelnuts. I use 3/4 almonds and 1/4 hazelnuts because I love hazelnuts!
Preheat oven to 375 degrees. Line a muffin tin with paper muffin liners or grease.
2 1/2 cups ground nuts (2 cups whole nuts equals about 2 1/2 cups ground)
1/4 cup melted butter ( I use half butter and half melted coconut oil) you can use yogurt also
1/4 cup honey or maple syrup more or less as desired ( you might need to heat the honey to liquify it a bit)
1 tsp baking soda
1/8 tsp salt
3 eggs
Put nuts in food processor and grind until very fine. Add all other ingredients, adding the melted butter last according to how much liquid you need to get the batter to a muffin consistency.
Batter can look a little runny but it’s ok.
Spoon the batter into the muffin tins, filling about 1/2 full.
Bake about 15 to 20 minutes until tester comes out clean. They won’t rise like regular gluten muffins just so you know.
Here are the variations:
Add 1/4 cup raisins
Juice and rind of one orange
Substitute dried, unsweetened coconut for part of the nut flour
1 mashed banana
And you can make nut bread by adding an extra egg and bake in greased loaf pan.
These are great spread with peanut butter!
Makes 12 muffins, usually
Braised Rabbit with Bacon and Sour Cream
April 18, 2014 § Leave a comment
Most likely you’ve got your Easter meal planned already but in case you haven’t and are looking for something a little different, how about rabbit? Easter and rabbits are somewhat synonymous aren’t they?
It was hard to find rabbit anywhere not that long ago. Only farmers and the European cultures knew what a tasty and healthy food rabbit was. I remember my grandmother and her rabbits. She raised them for her food, like the chickens and ducks. And she would use every part of every animal, making sausage and stocks. Luckily now you don’t have to raise them, you can buy rabbit in major supermarkets and order online as well.
True peasant food, it’s a very lean, delicious meat that needs some fat in the cooking process. And bacon and rabbit go together like, well Easter and eggs. Though there’s not much that bacon doesn’t go well with! It’s even in chocolate now, a brilliant combination I think!
I love to braise meat and rabbit cooked this way comes out moist and tender. Simply start the process on top of the stove then put it in a hot oven to finish. A side dish of asparagus and boiled potatoes to soak up the sour cream sauce would make a wonderful Easter dinner. And it’s so simple, the way I like to cook.
Ingredients:
1 whole rabbit cut up
1 onion, chopped
2 or 3 slices of bacon, chopped
chicken stock, about 1 to 2 cups
salt, pepper, paprika
1 cup white wine
large scoop of sour cream
Preheat the oven to 375 degrees.
Salt and pepper the rabbit.
In a large saucepan over medium heat, cook the bacon and onions until soft. Remove with a slotted spoon and set aside.
If you don’t have enough fat to brown the rabbit add some olive oil to the pan, about 3 to 4 TBL.
Turn the heat up high and add the rabbit pieces. Brown well.
After you finish browning, add the chicken stock so that the rabbit is submerged in it.
Return the bacon and onion to the pan. Sprinkle liberally with paprika.
Bring to a boil then cover tightly and put in the preheated oven.
Bake until tender, about 1 to 1 1/2 hours. Check occasionally to make sure the liquid hasn’t boiled away. Add more stock if necessary.
When done, remove rabbit to a warm plate, cover with foil while you make the sauce.
Turn the heat to high. You should still have some liquid in the pan, if not, add more to the pan. Add the wine, then bring to a boil and boil a few minutes, stirring up all the good stuff on the bottom of the pan.
Turn off heat. At this point you can puree the liquid in a blender if you want (be careful with hot liquid!) Or if you like a chunky sauce, don’t.
Stir in the sour cream, taste for seasoning.
Return the rabbit and the juices on the plate back to the pan. Let it sit for a few minutes.
Serve with potatoes or a side dish to your liking, or just a vegetable. Applesauce or cranberry sauce goes well with this.
Enjoy and Happy Easter!
Chocolate Popovers
March 22, 2014 § 4 Comments
In case you haven’t noticed, spring is here, officially at least. And no, I haven’t noticed!
Not up here on the hill, on the dirt road off a dirt road, with 2 feet of snow still on top of my garden. But I know it’s trying hard to get here, the poor robins are flying about, the chickadees are singing and the chickens are laying again. Soon I’ll be outside, looking for the first snowdrops and itching to get into the dirt.
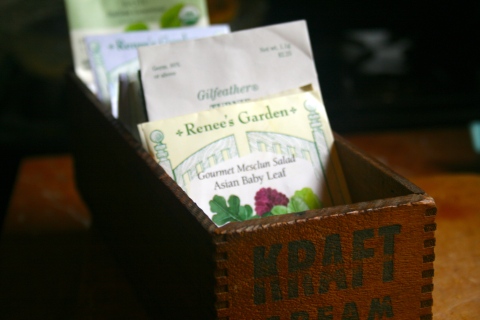
Even with the sun shining stronger every day it’ll take some time for all this snow to melt. But it helps to look through the seed and flower catalogs that have piled up since January.
For now though, I’m spending most of the days inside and thinking of good things to eat! This morning I was craving a chocolate croissant, but I knew there was nowhere even remotely close that I could get one. That’s the thing about living in the country, no quick trips to the bakery or cafe for a latte.
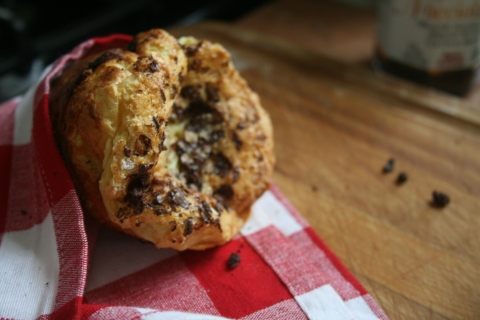
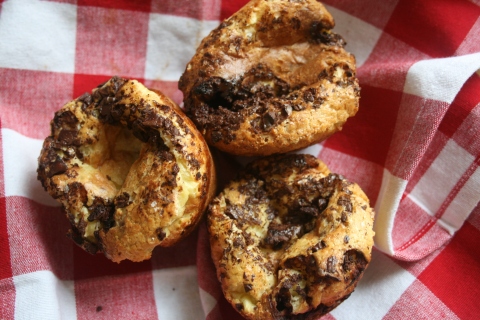
Since making chocolate croissants was totally out of the question, what would be the next best thing? Chocolate popovers…. and luckily I had some chocolate in the pantry and with eggs, milk and flour and about 60 minutes, I’d be biting into a warm chocolate-y treat.
Even though they didn’t have that flaky croissant thing going on, they definitely did the trick. Custardy and rich, the chocolate turned a little crunchy on top, almost like chocolate chips. Here’s a basic recipe, just add chocolate.
Popover pans work best but a regular muffin pan will work too. I had a 6 cup large muffin pan, so use what you have.
Ingredients:
1 1/2 cups four, I used white spelt
1 tsp sea salt
3 eggs, room temperature
1 1/2 cups milk, room temperature
1 TBL sugar
2 oz. semi-sweet chocolate, chopped up
1/2 tsp vanilla extract
Preheat oven to 450 degrees. Put a popover or muffin pan into oven while it preheats.
It’s important that the eggs and milk are room temp as you don’t want the batter to be cold when you put it into the hot muffin pan. You can warm the milk and the eggs too if you’re in a hurry. Just submerge the eggs in warm water for about 10 minutes, and heat the milk in a saucepan.
Mix the flour, sugar and salt in a separate bowl. Whisk the eggs, milk and vanilla until frothy, then add the flour mixture.
Mix these together briefly, don’t over-mix. You want to see some small lumps.
When ready, take the pans out of the oven, then quickly grease them with butter. Make sure to get the sides and also the tops if you are using a muffin pan.
When greased, fill each 3/4 full then sprinkle with the chocolate pieces.
Bake 20 minutes, then turn down oven to 325 and bake another 15 minutes.
Remove from oven, insert a small pin into each one to release the air so they won’t fall immediately. Then remove and cool on a rack briefly.
Eat right away!
Makes about 6 large or 12 small popovers. This basic recipe is from Martha Stewart, I just used spelt flour instead of all purpose.
Flaxseed Crackers with Herbs and Garlic
March 9, 2014 § 13 Comments
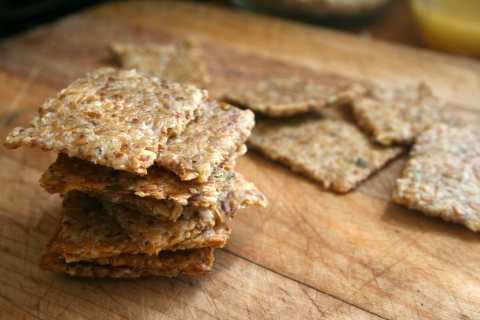
Have you ever tried making your own crackers? Why? you might ask. It’s so easy buying them, even the healthier versions are available almost everywhere, gluten free and all that. But just like baking your own bread, or making Kombucha in your own kitchen, it’s a very satisfying thing to do. And most importantly for me, I know exactly what’s in it, and not in it. Even “healthy” crackers have a lot of ingredients listed that I’d really rather not eat. Things like potato starch, xanthan gum and natural flavors.
I found this recipe in Organic Gardening magazine awhile ago and have had it sitting on my counter, waiting for the day when I had the urge to make crackers. And today was the day for some reason!
The recipe looked pretty easy, and it was, though it took a little more time to bake than the recipe said. Could be my oven (I know, I need to get an oven thermometer) could be I didn’t roll them thin enough. But they turned out great nonetheless.
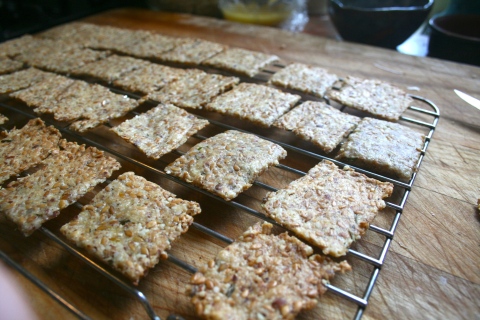
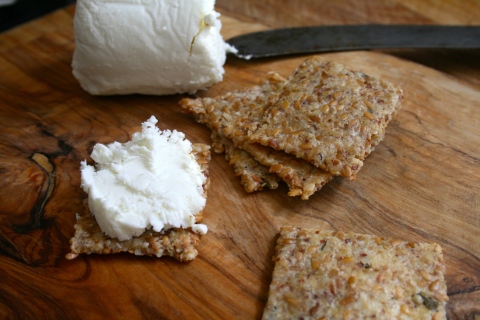
They’re delicious and crispy, full of good things like flaxseed, garlic and almonds, and they’re gluten free, which is the best part. I can eat them without thinking about that darned gluten all the time. Try them with cheese, like goat cheese, or even all by themselves.
So if you enjoy baking, give them a try. You’ll be a little proud of yourself too!
Ingredients:
1/2 cup almonds
1/2 cup organic golden flaxseed
1/2 cup hot water
1/3 cup grated Parmesan cheese
3 TBL olive oil
2 tsp minced fresh rosemary
1 tsp minced garlic
1 tsp fine sea salt
1/4 tsp fresh black pepper
1/2 cup garbanzo bean flour*
Preheat oven to 350 degrees.
Cut 2 pieces of parchment paper to fit neatly into an 18 x 13 inch baking sheet. This is an important step, please don’t improvise here.
Put the almonds into a food processor and process until finely ground. Put into bowl and set aside.
Put the flaxseed and the hot water into the food processor and let the seeds soak about 15 minutes, until the water is absorbed and it looks a little gelatinous.
After 15 minutes, add the cheese, oil, rosemary, garlic, salt and pepper to the food processor and process until the mixture is smooth, only about 30 seconds. Scrape the sides if needed.
Add the ground almonds and garbanzo bean flour to the food processor and pulse about 20 times. The mixture will come into a moist ball.
Turn the dough out onto one of the pieces of parchment paper (on a large cutting board). With moist fingers, pat the dough into a rectangle about 8 in. long by 6 in. wide.
Cover the dough with the second piece of parchment paper and roll it out between these 2 sheets until it reaches the edges of the paper. The dough should be about 1/16 in. thick. That’s why it’s important to follow the directions for cutting the parchment paper in the beginning. It’s ok if some of the dough squishes out of the edges.
Now remove the top layer of parchment and remove the dough that squished over the edges. A sharp knife will do. Using a pizza wheel, cut the dough on the parchment paper into 2 x 2 in. squares.
Gently pull the parchment paper (with the dough on it) onto the baking sheet and bake, rotating every 5 minutes or so, for about 15 minutes. The outside crackers will be crispy and golden brown. Remove these and continue baking the rest, rotating again, until they’re all done. Transfer the firm crackers to a cooling rack as you bake. Time will depend on thickness and your oven.
And that’s it! Makes a great gift for your gluten free friends too.
*Can be found in most health food stores. Bob’s Red Mill also makes it and it’s carried in most supermarkets now.


